Final Image PreviewBefore we get started, let's take a look at the image we'll be creating. click the screenshot below to view the full-size image. As always, the full layered Photoshop file is available via our
PSDTUTS Plus membership.
 Step 1
We'll start with the grunge image. You can use a Web banner, a disk label, or anything you want. This tutorial is about creating a mock-up intended to improve the final presentation of your work. Feel free to use any image you prefer.
First create a new blank document 1000px by 330px, RGB, 72 ppi, and paste this
image as a background. Then save the document with the name of "My texture." Keep this file handy, as we'll need it later in the tutorial.
 Step 2
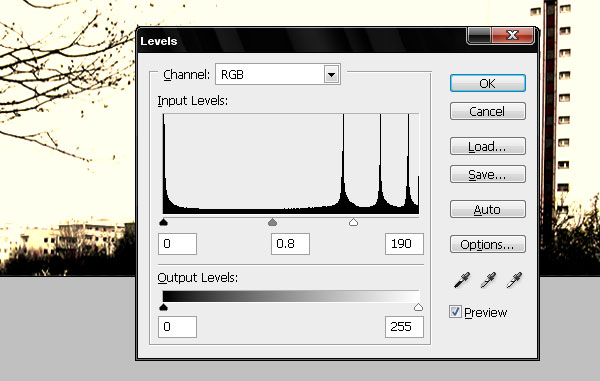
Adjust the image Levels using these values.
 Step 3
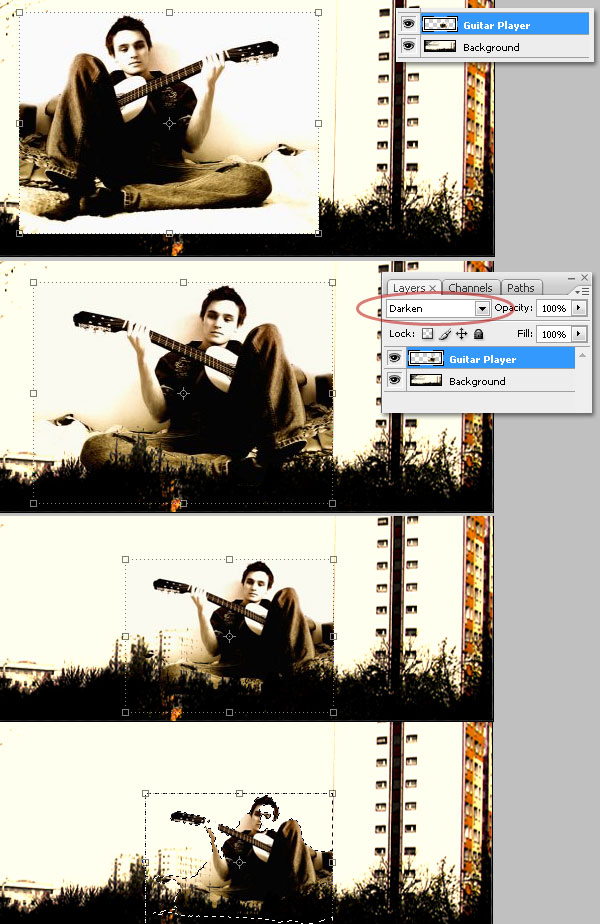
Now add some images to create a grunge collage. Paste this
image of a guitar player into a new layer above the background. Then go to Edit > Transform > Flip Horizontal. Set the Blending mode to Darken. Resize it and place it near the building. Finally use the Magic Wand Tool to select all the white areas of the guitar player and delete them.
 Step 4
Find more images and paste them anywhere you like. You can use this
image. Select the Magic wand Tool. Then delete all the background and paste it at the center of the collage.
 Step 5
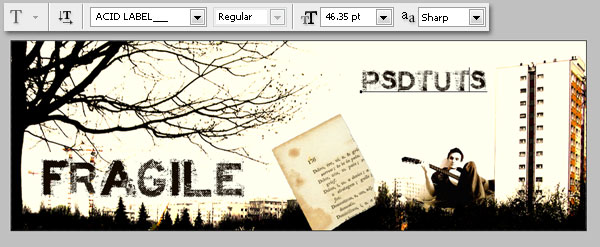
Use a grunge font to add some text. I used a font called Acid Label, downloaded from
here. Then set the type color to (#130900) and try to get something like the image below. Save your document and flatten the image.
 Step 6
Create a new document that is 1024px by 768px, RGB, 72ppi. Create a gradient background that goes from (#000000) to (#302013) using the values in the image below.
 Step 7
Hide the gradient layer. Then create two more layers above it and name both "Dark Gradient 1" and "Dark Gradient 2" respectively. Then press D to load the default palette. Fill both layers using the Gradient Tool (black to transparent). Use the values in the image below.
 Step 8
Now paste this
image in the center of the document. I chose it because it's a nice handcrafted box that looks like a shipping crate, which is perfect to mock-up a grunge design. Fix the imperfections of the image using the Clone Tool and Healing Brush Tool. Alt-click to select the clone source.
Tip: Photoshop CS3 Extended has a useful Tool. click on Window > Clone Source. Select "Show Overlay." You will see a transparency of the image you are cloning. This will help you with precise healing. Step 9
Select all the white background with the Lasso Tool and then delete it. Add a Drop Shadow and an Inner Shadow, using the values in the image below. Use the Dodge Tool and Burn Tools to brush with these settings: 50px, Hardness: 0%, Range: Midtones, and Exposure: 25%. This will lighten and darken some areas of the box.
 Step 10
Now we will add a wrinkled paper texture to our design. I used this
image. Paste it into a new layer below the "Box" layer and name it "Paper." Put it in the upper margin, a bit up the middle of the document. Then adjust the Hue/Saturation using the values in the image below. Set Blending Mode to Color Dodge. Finally, go to Layer > Layer mask > Hide all, and draw a black-white Radial gradient.
 Step 11
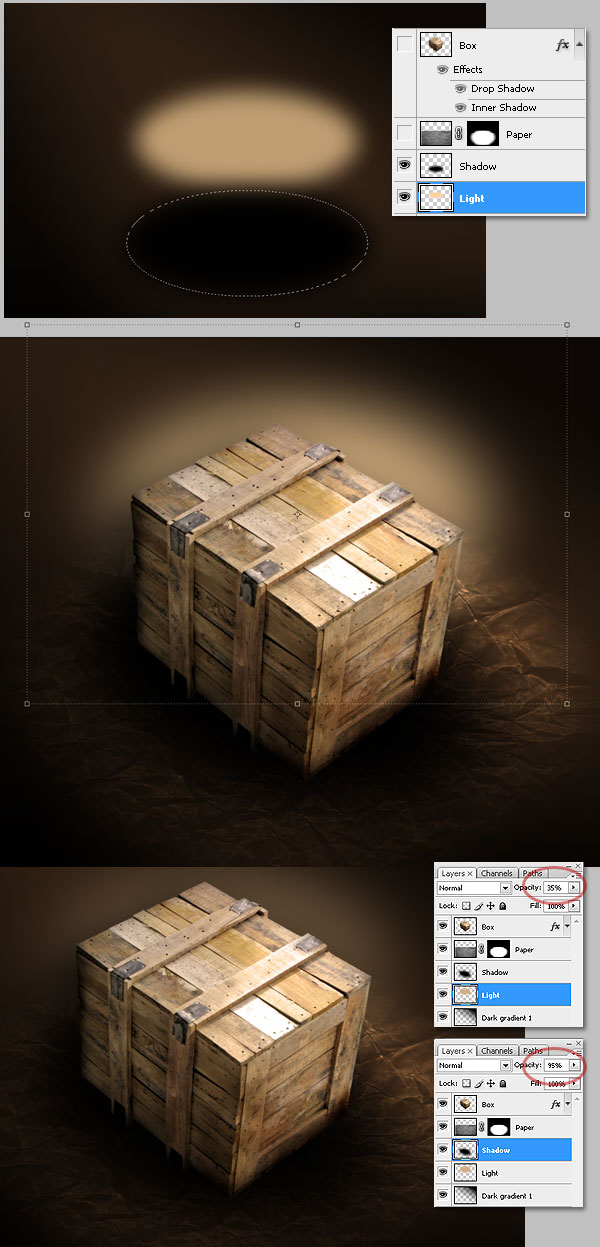
Hide both the "Box" and "Paper" layers. Create two new layers below the "Paper" layer and name them "Light" and "Shadow" respectively.
Use the Elliptical Marquee Tool to create an oval in each layer. Then Select>Modify>Feather and set the Feather radius to 25px. Fill one with a light color like (#C6A478) and the other with a dark color like black. Show the hidden layers and Free Transform the ovals to get a better result. Finally, with the "Light" layer set the Layer Opacity to 35% and "Shadow" Layer Opacity to 95%.
 Step 12
Open the "My texture" file (the grunge collage we created earlier). Then copy the flattened image. Create a new layer above the "Box" layer. Name it "Texture" and select it.
Here comes the best. We will use the new feature of Vanishing Point Filter to create several perspective planes into a single filter. Click on Filters > Vanishing Point. Then start creating a single plane using the Create Plane Tool, Ctrl+Drag (WIN) or Command+Drag (MAC) a side point of the plane (not a corner point) to create a perpendicular plane. Then Alt+Drag to edit the angle of the new plane, trying to follow every surface of the box.
Tips: If you want to delete a plane, just select any side point and press Delete. If you cover the front and left side it's OK. It's optional to cover the top side. Step 13
Paste the flattened image in the Vanishing Point window. Then drag it over the surfaces and place it wherever looks good. You can resize and rotate the image if you need to. If there are some overlapping planes, Ctrl-click or Command-click a plane to change the overlapping order. Then click OK when you're finished.
 Step 14
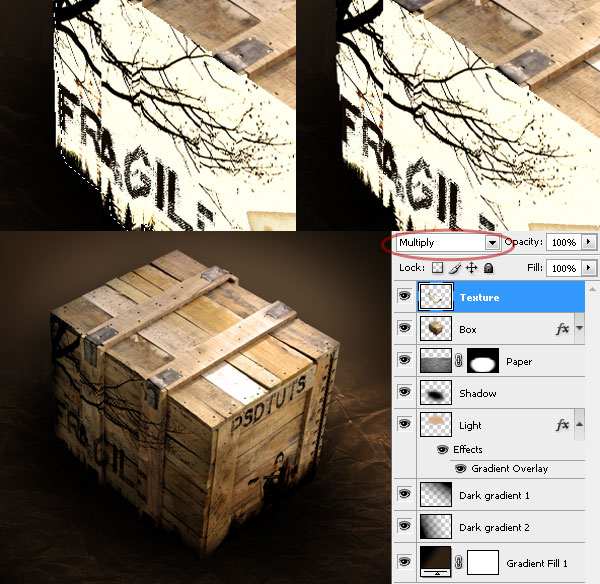
Ctrl (Command) + click the Box layer to get the exact box shape. Then Ctrl (Command) + Shift + I to invert the selection. Then select the "Texture" layer and press Delete. Finally, change the "Texture" layer's blending mode to Multiply.
 Conclusion
Optionally, you could paste more objects like text, images, or anything in the box top. Play with blending modes and effects. You can use this technique to create mock-ups of anything you want: CD labels, product boxes, DVD covers, and more. Try it!


